Sometime in the mid-1990s, after a lifetime of servitude to the shriveled heads of garlic I would bring home from the supermarket, I finally declared myself independent. As a cook and a garlic lover, I would no longer stand for garlic heads containing 47 cloves each — cloves I had to painstakingly peel one by one to get the itty-bitty chunks of garlic inside.
Since then, I’ve been fortunate to interact exclusively with big, easy-to-peel cloves. It’s the best garlic money can buy, and I get it for free because I grow it. It takes about nine months, from September to the following summer, for a clove to grow into a head. If you’re going to invest that much time and effort, you should be planting the good stuff.
The central distinction in garlic botany is between the hardneck and softneck varieties. The cheap stuff from the supermarket is of the softneck persuasion, while the good stuff is all hardneck. The name hardneck refers to the flower-like organ, called a scape, that sprouts from the middle of the garlic plant around the summer solstice. The scapes must be pulled to redirect all of the plant’s energy into the below-ground bulb, so it grows as large as possible. This chore is also the first garlic harvest of the season.
If you want to be independent like me and plant your own garlic, the best place to find hardneck is your local farmers market. You can also order it online, although most farms tend to sell out of the good stuff before the mid-July harvest.
Wherever you get your seed garlic, it will cost you. Just remember that your initial investment will be offset by the fact that you’ll never have to buy garlic again.
As you round up your seed garlic and figure out where to plant it, you should also take steps to prepare the ground as necessary. If it’s a fully prepped garden bed that’s ready to go, you can skip this step. But if the location of your new garlic patch is overgrown with weeds or is currently a piece of lawn, you can kill all the plants by laying down a piece of plastic, preferably black. After eight weeks, the weeds or grass will be gone, and the dirt beneath the plastic will turn over like butter.
Since I can’t stand to see an empty piece of dirt in my garden, I like to fill it with short-season crops like radish, cilantro, spinach and other plants that will be done by late September or will peacefully coexist with the garlic I plant around them.
Recently, I’ve been harvesting the scapes from last year’s planting. I yank each one gently as soon as it’s long enough to grab. If you do it right, the scape breaks deep inside the plant and emerges with a pop, yielding an extra tender and juicy garlic heart.
The other day, I chopped up some scapes and put them in a pan with some radishes I pulled from next year’s garlic patch. I fried the scapes and radishes — including the chopped radish leaves — and when they were cooked, I poured in some beaten eggs. I put a lid on the pan and let the eggs cook slowly until they were done to my liking. I seasoned with salt and hot sauce and basked in the feisty taste of freedom.
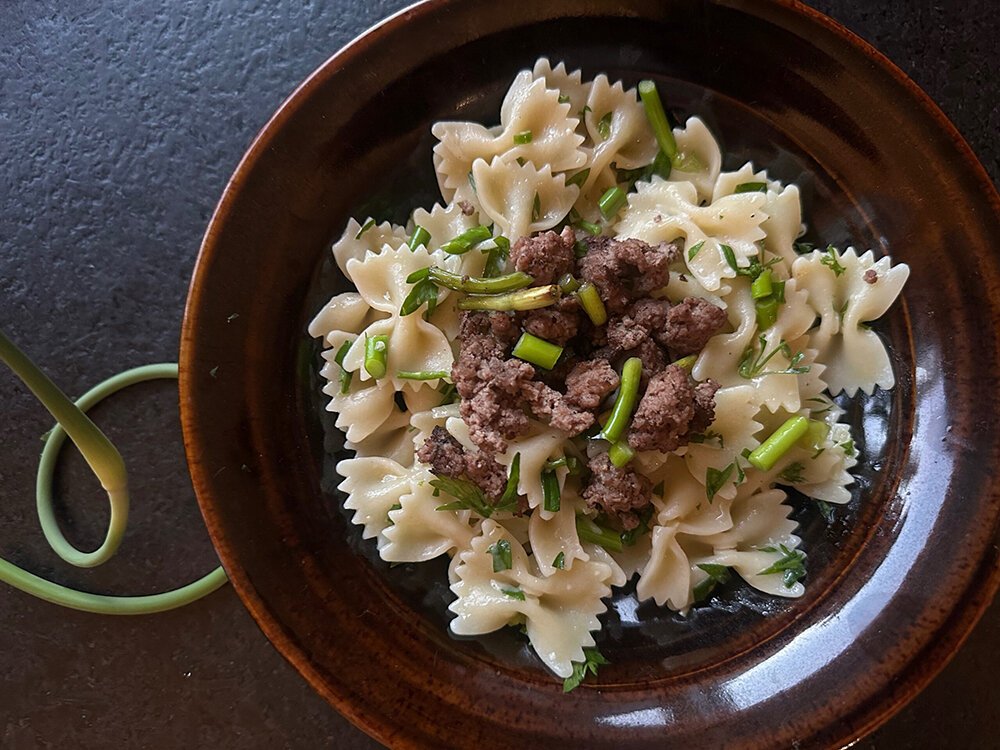
Scape pasta with parsley
The parsley can be swapped for basil, oregano or other herbs. For a non-veg option, sprinkle fried ground beef on top as a garnish. This dish can be a bit spicy because the scapes are only slightly cooked by the hot noodles. If you want it mellower, fry the scapes.
While the pasta cooks, chop the scapes and herbs finely. Brown the meat if using. Heat the marinara if you want some. Fry the scapes if you can’t take the heat.
When the pasta is done, drain and toss with the oil, herbs, scapes and cheese. Garnish with red sauce and meat.


Support City Pulse - Donate Today!
Comments
No comments on this item Please log in to comment by clicking here